Schedule local notifications on Android (Kotlin) using Work Manager

I'm a Software Engineer currently building Mobile applications for Flutter and Native iOS.
I got into mobile application development because of how versatile and useful they are in particularly how "mobile" they can be of course 😜.
I enjoy building products that create an impact in an individuals day to day life.
I also love architecting mobile applications from end to end and ensuring I write clean and testable code that can scale long term.
Schedule local notifications on Android (Kotlin) using Work Manager
Most applications have a way of handling immediate or long running background tasks that gives some kind of information or notification or just does something in the background (while your app is “inactive / in the foreground”). This type of process is termed persistent work meaning it will continue to run / remain scheduled even when your app is closed or your device is restarted and there’s also impersistent work which is no longer scheduled after execution.
This type of functionality can be implemented in your app using android’s Workmanager, A jetpack library.
There are basically three types of persistent work :
Immediate
Long running
Deferrable
Immediate as the name suggests meaning to start and finish as soon as possible. These types of tasks are best to use when whatever is important to the user and can complete within a few minutes.
Long Running these types of tasks run longer for at least 10 minutes +.
Deferrable these are tasks scheduled to start at a later time and are set to run at intervals.
After defining what type of persistent work you want to carry out, you need to know what two types of task can be executed by WorkManager.
There are basically two types of Work Requests :
One Time Work Request
Periodic Work Request
One Time Work Request schedules work to be executed only once.
Periodic Work Request schedules work to be executed more than once.
You can read more about work manager here, work requests here and also read about background task in android here .
GETTING STARTED
We will be using some dependencies from android which we need to add to our app level gradle file.
Dependencies:
Databinding
Navigation Component
Room
LiveData
ViewModel
WorkManager
Usages
Databinding : is a improved way of getting data from your datasources to your layouts. Viewbinding replaces the findViewById way of getting your views from layouts to your code. Databinding is just Viewbinding but with the ability to access and observe data.
Navigation component : using the single activity multiple fragments with navigation graph you get access to context that can be used anywhere, it’s faster than using activities and allows you to quickly create navigation links between fragments and pass arguments using safeargs.
Room : room is a jetpack library that handles all the boilerplate used to setup an sqlite database in your android application and also gives you an easy way to make queries to the database from using the @Query annotation.
LiveData : live data is a jetpack library used to handle application’s lifecycle more efficiently without having to worry about handling each lifecycle callback. It is lifecycle aware.
ViewModel : using the viewmodel you can properly handle UI related data and also do this in a lifecycle conscious way.
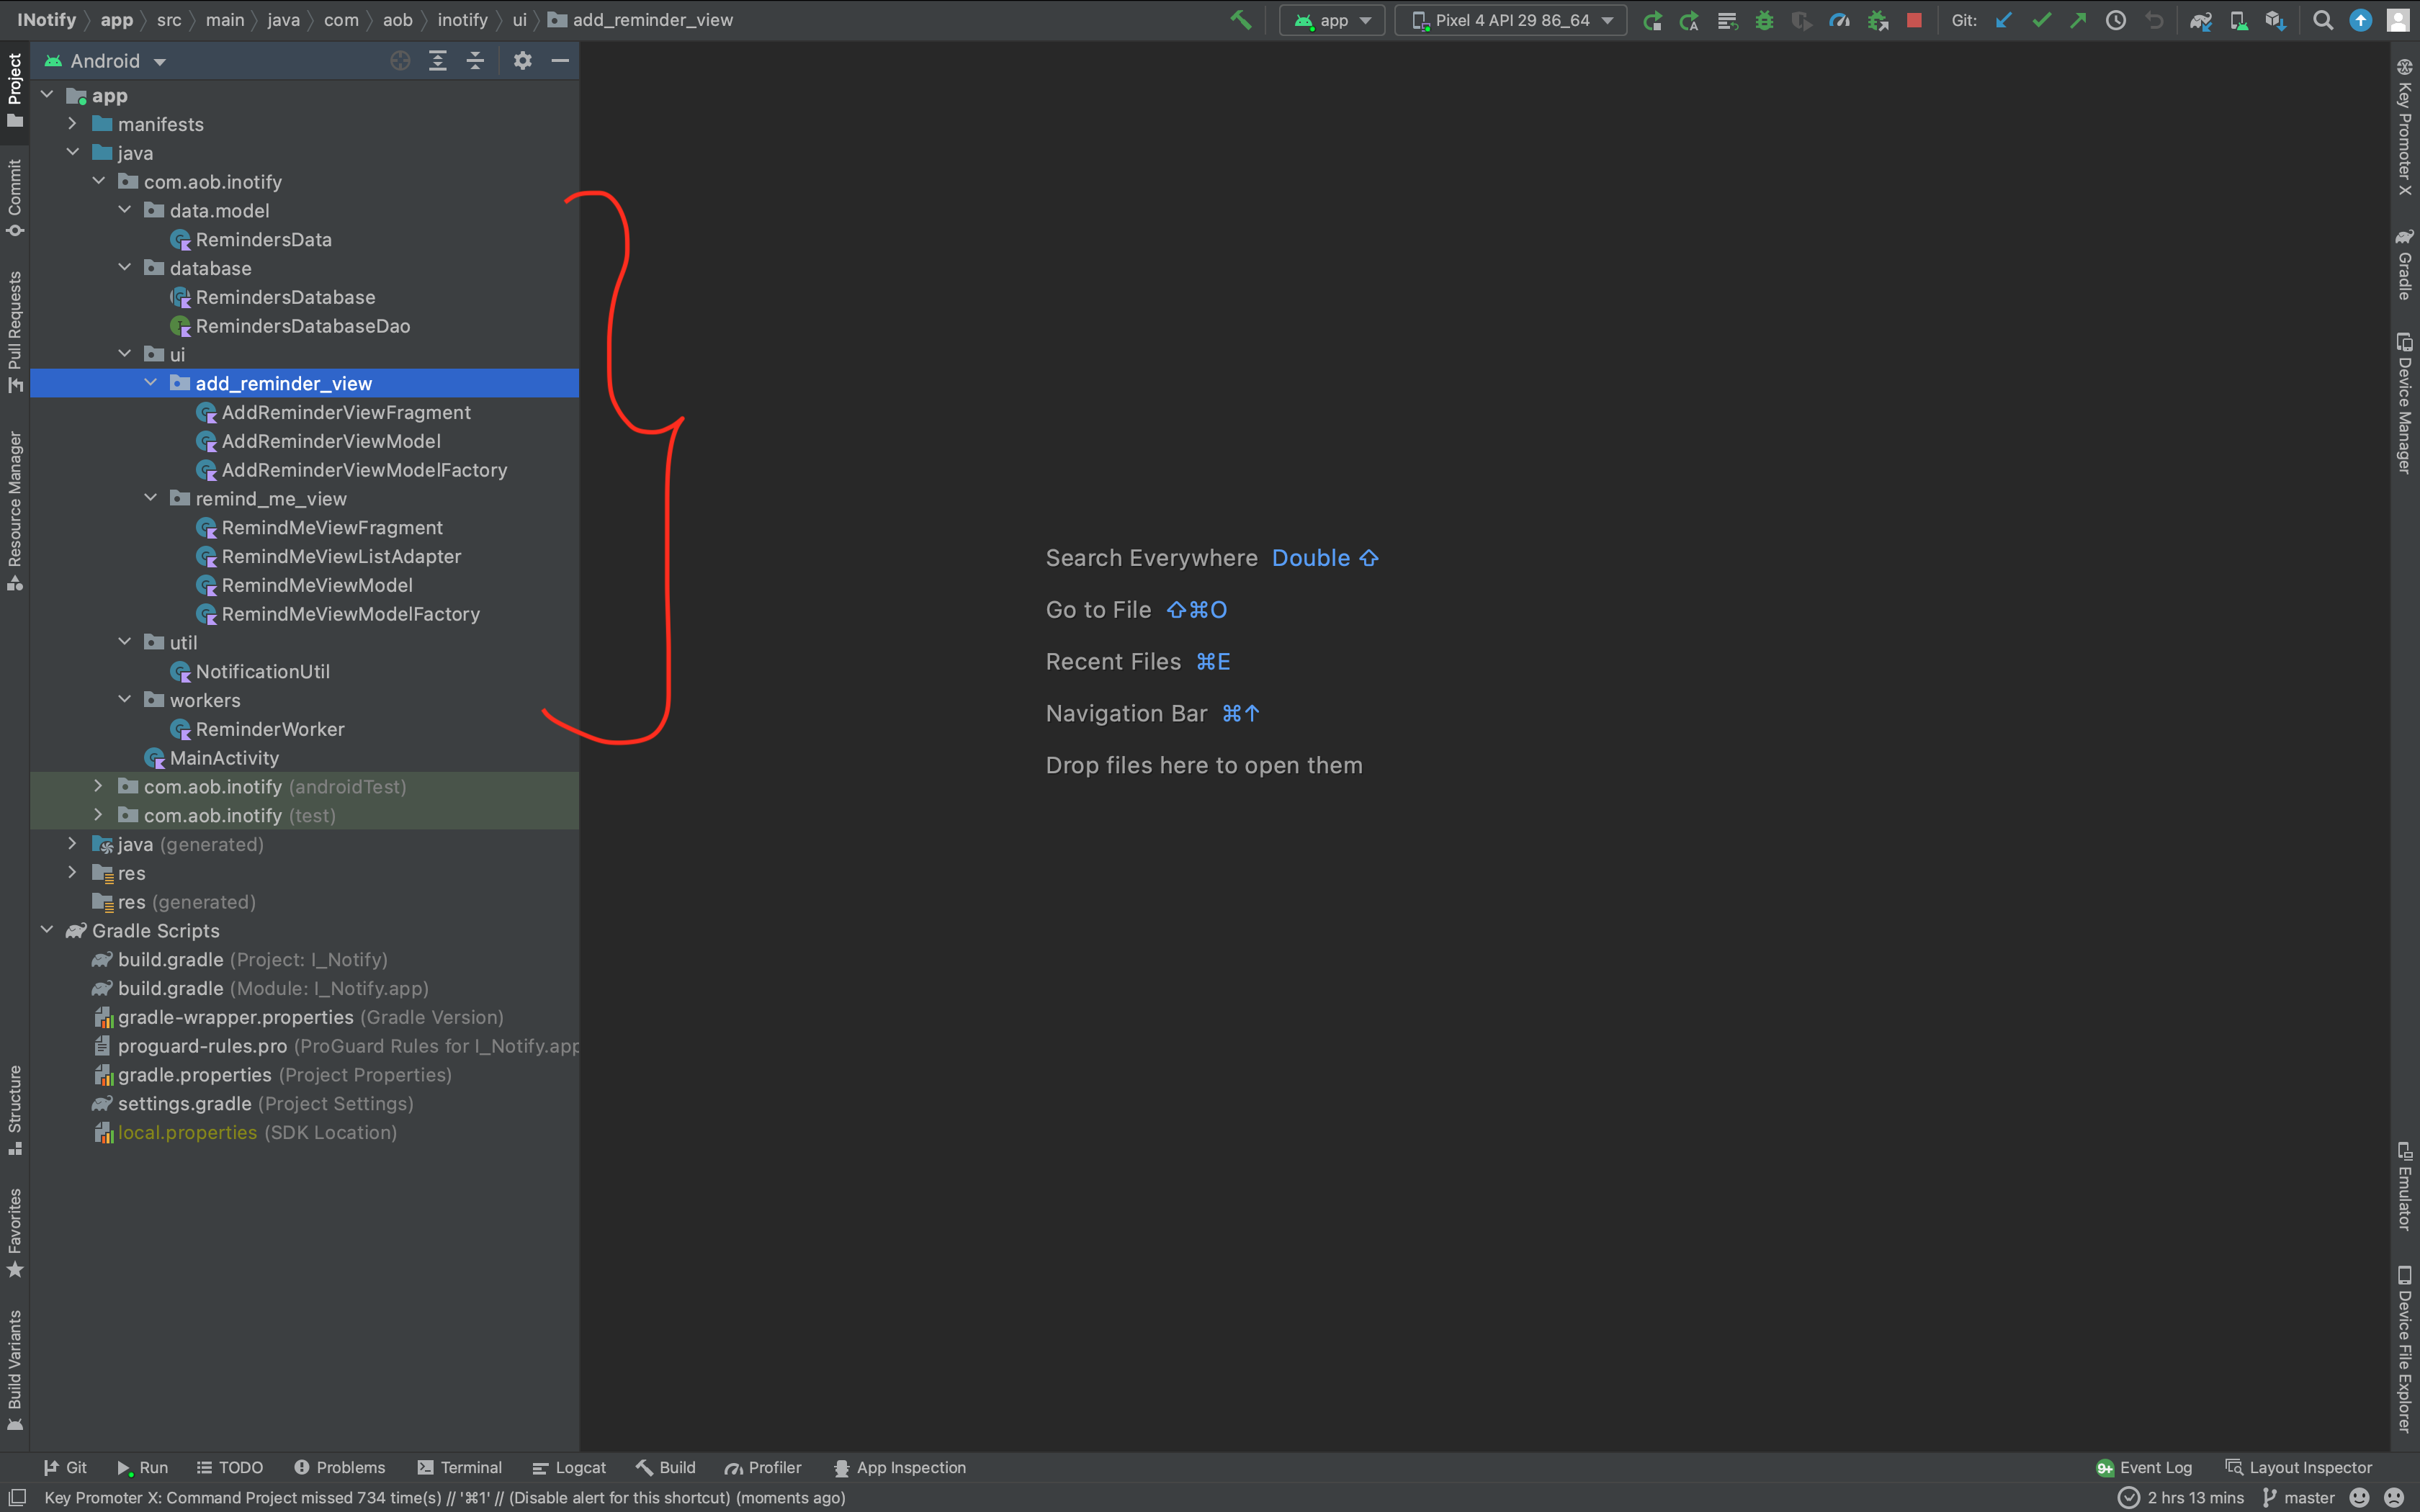
FOLDER STRUCTURE WITH MVVM
We will be using the recommended architecture by android that is the Model-View-Viewmodel.
The good thing about using a design pattern is you get to separate the user interface from the business logic so as to not write confusing (spaghetti 😒) code.
This pattern suggest you get your data from the model using the viewmodel and then to the view. Android has made that easy by using the ViewModel and LiveData to ensure that business logic stays away from the view and also handling application lifecycle processes efficiently.
As a beginner, I don’t think you should be worrying too much about the structure of your application code as you get better, learn more and read more you’ll understand more and the reasons behind using a design pattern for now the main focus should be building things.
I’ll explain what each folder contains :
data : this contains as the name suggests “data”, this includes your data classes (models) kotlin provides a more concise way of creating models which is using “data classes”, this provides a primary constructor in it’s one single line definition and also provides getters. To create setters you’d have to use “var” keyword as “val” makes it final / immutable.
database : this contains the database interface (which we would depend on) instead of the actual implementation which is generated by Room. We will define our DAO (Data Access Object) here and create the Database class which is a singleton (returning the same instance each time it’s called).
ui : this contains the user interfaces / views, this is the class that connects the layouts to the business logic using viewbinding/databinding (not the same thing).
workers : this is a preference type way of organizing your workers, just like every other folder. It contains your Worker class which we will use to do some persistent work using Work manager.
util : this contains any helper class or utility class used to do some particular work could be used to apply formatting to some strings or return something based on some logic etc.
LET’S BUILD OUT OUR USER INTERFACE
We’ll use something basic to build the UI not to make it too complex, using linear layouts and constraint layout.

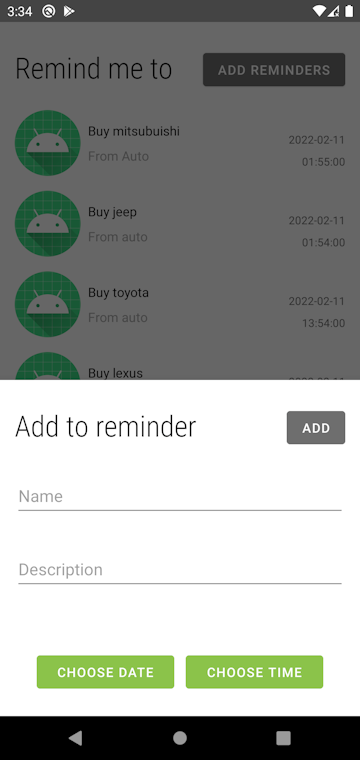
It’ll have a list of things we add to our reminder “A reminders list” also we would add a button to add new reminders which opens up a Bottom Sheet where we can add to our reminders list, quite simple.
MAIN APPLICATION FUNCTIONALITY
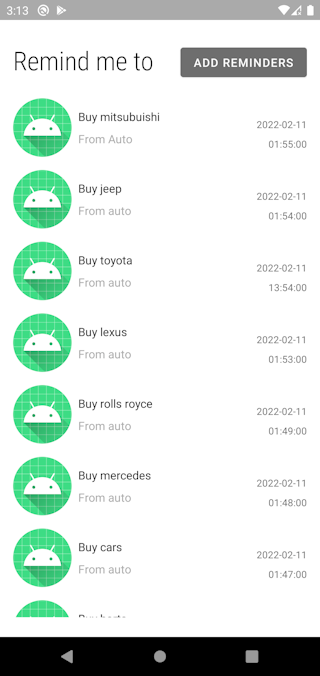
RECYCLER VIEW
Here we use a recycler view to display our list of reminders.
We add reminders to the database using the “Add reminders” button on the home screen and we then get that list of reminders in descending order to display using the recycler view.
Here you will see I didn’t make this the full CRUD operation that is Create, Read, Update and Delete. This can easily be added by adding a few queries to the DAO (Data Access Object) and creating the view to delete or update a single reminder.
Using the database we can persist our reminders list data through app restarts. This does nothing more than just showing our list of reminders.
Setting up the recycler view
This method is called in the onCreateView() of the main view RemindMeViewFragment which then ensures that recycler view is created using the list of reminders from the database.
We observe the LiveData reminders which returns a list of reminders and then we use the Recycler view’s adapter to update using our adapters list of reminders.
/**
 * This observes/listens to changes in the database of reminders and since we're
 * observing the list of reminders we can actively update our recycler view by using
 * the adapter's constructor where we pass the list of reminders.
 */
 private fun setupListView() {

        // observe the reminders list to get updates and use it to populate the recycler view
        remindMeViewModel.reminders.observe(viewLifecycleOwner) { list ->
            val adapter = RemindMeViewListAdapter(list)
            binding.remindersRecyclerView.adapter = adapter
        }

        // this creates a linear layout manager since our list view is in a linear form
        binding.remindersRecyclerView.layoutManager = LinearLayoutManager(requireContext())
    }
LOCAL NOTIFICATION
Creating local notifications in android is somewhat straightforward, using notification manager by calling the notify() method and passing in an id and a Notification object.
Setting up our notification objects
This method creates a Notification manager, Notification channel, Pending Intent and Actual Notification object.
Notification manager is in charge of posting / building the actual notification object after it has been created and also takes in an id which will be used to make each notification unique and ensure they don’t get replaced (this happens if the ids are the same)
Notification channel is used to separate / identify this apps notifications from other applications notifications and also add some extra features to our notification e.g. vibration, sound, notification visibility and so much more.
Pending Intent is used to carryout a task when the user takes an action on the notification e.g. when the notification is tapped on.
Notification object is used to setup the notifications details and extra functionality. Here we set the content title to be the reminder name and content text to be the reminder description.
/**
 * This method is used to create our notification and pass in the reminders
 * name and description
 */
 fun showNotification(context: Context, id: Int) {
        val notificationManager = context.getSystemService(Context.NOTIFICATION_SERVICE)
                as NotificationManager

        // create notification channel
        if (Build.VERSION.SDK_INT >= Build.VERSION_CODES.O) {
            val channel =
                NotificationChannel(NOTIFICATION_CHANNEL, NOTIFICATION_NAME, NotificationManager.IMPORTANCE_HIGH)

            // use the default notification ringer on device
            val ringtoneManager = RingtoneManager.getDefaultUri(RingtoneManager.TYPE_NOTIFICATION)

            // we add audio attributes
            // first we set usage; "why" you are playing a sound, what is this sound used for.
            // second we set the content type; "what" you are playing.
            val audioAttributes = AudioAttributes.Builder()
                .setUsage(AudioAttributes.USAGE_NOTIFICATION_RINGTONE)
                .setContentType(AudioAttributes.CONTENT_TYPE_SONIFICATION)
                .build()

            // We add a few extra things like notification lights on devices that support an indicator for notifications
            // We also enable vibration
            channel.apply {
                lockscreenVisibility = Notification.VISIBILITY_PUBLIC;
                enableLights(true)
                lightColor = Color.RED
                enableVibration(true)
                setSound(ringtoneManager, audioAttributes)
            }

            notificationManager.createNotificationChannel(channel)
        }

        // Create a pending intent
        // A pending intent is an intent that will be done at a later time when an action is carried out
        // Here this action is when the user taps the notification.
        val intent = Intent(context, RemindMeViewFragment::class.java)
        intent.flags = Intent.FLAG_ACTIVITY_NEW_TASK or Intent.FLAG_ACTIVITY_CLEAR_TASK
        intent.putExtra(NOTIFICATION_ID, id)
        val pendingIntent = PendingIntent.getActivity(context, 0, intent, 0)

        // Create notification
        // Here we set our notification title, text, icon, a pending intent that carries out some action
        // when the notification is tapped.
        val notification = NotificationCompat.Builder(context, NOTIFICATION_CHANNEL)
            .setContentTitle(name)
            .setContentText(description)
            .setSmallIcon(com.google.android.material.R.drawable.ic_clock_black_24dp)
            .setContentIntent(pendingIntent)
            .setPriority(NotificationCompat.PRIORITY_MAX)
            .setAutoCancel(true)

        // Post a notification to be shown in the status bar. If a notification with the same id has already been
        // posted by your application and has not yet been canceled, it will be replaced by the updated information.
        notificationManager.notify(id, notification.build())
        Log.d("ReminderWorker", "Reminder name $name, description $description")
    }
WORK MANAGER
Creating our worker
To use / implement work manager methods you need to extend the Worker abstract class
which gives you access to the doWork() method, this is where you’ll add any task you want to be carried out.
Here you’ll see the usage of inputData provided by Worker which allows you pass data into your task using key-value pairs.
This method returns a success or failure depending on whether or not the task created was done without any exceptions being thrown.
You see we also have our notification utility class “NotificationUtil” here where we initialize by passing in reminder name and description which will be used by our notification.
We then call the showNotification() method and pass in the applicationContext and a unique id.
class ReminderWorker(context: Context, workerParams: WorkerParameters) :
    Worker(context, workerParams) {

    /**
     * This method is called by work manager once it needs to carry out any scheduled task
     * executed on ReminderWorker
     */
       override fun doWork(): Result {
        // get the name for the notification using inputData from Worker
        val name = inputData.getString("name")
        // get the description for the notification
        val description = inputData.getString("description")
        // create a generator for unique ids, this will make sure notifications don't get replaced
        val id = inputData.getInt(NotificationUtil.NOTIFICATION_ID, Random(System.currentTimeMillis()).nextInt(1000))

        // try to do work if successful return success else return failure
        return try {
            // do the work of sending notification
            val notificationUtil = NotificationUtil(name.toString(), description.toString())
            notificationUtil.showNotification(applicationContext, id)

            Result.success()
        } catch (e: IOException) {
            Result.failure()
        }
    }
}
SCHEDULING THE REMINDER
Now we want to initialize, setup and schedule our notification to remind us about what we just added to our list of reminders.
Get the delay
This method is called in the onClickListener of our “Add” button.
We pass in a delay in milliseconds which is calculated from the difference between the set reminder date time and current date time.
The getDelay() method returns the delay in milliseconds using the SimpleDateFormat we just add a pattern to format the date and time being passed from the date and time pickers.
/**
 * This is used to calculate the time difference from now to the set reminder time.
 */
 fun getDelay(): Long {
        // this is the date and time formatter using the timezone
        val dateFormatter = SimpleDateFormat("yyyy-MM-dd, HH:mm:ss", Locale.ENGLISH)
        dateFormatter.timeZone = TimeZone.getDefault()

        // get current date
        val currentDate = Date()
        // using the pattern set get the reminder date
        val reminderDate: Date? = dateFormatter.parse("$reminderDate, $reminderTime")

        // get the reminder time in milliseconds
        val reminderTimeMilliseconds: Long? = reminderDate?.time
        // get the current time in milliseconds
        val currentTimeMilliseconds: Long = currentDate.time

        Log.d(TAG, "Reminder milliseconds $reminderTimeMilliseconds CurrentTime milliseconds $currentTimeMilliseconds")

        // try to get the difference between the reminder set time and current time
        // which sets the delay before the notification comes
        return reminderTimeMilliseconds!! - currentTimeMilliseconds
    }
Schedule notification
This schedules the notification using the Data.builder() from Work library, the delay, the OneTimeWorkRequest and a WorkManager instance (a singleton).
The data variable is used to get our reminder details we set from our Add Reminder bottom sheet view, we pass in the “name” as the key and value as the EditText reminder name and also the “description” as the key and value as the EditText reminder description.
We get the delay and pass / set it into our OneTimeWorkRequest Builder which takes in our ReminderWorker class (this extends Worker) and the inputData that will be used by the notification object.
We get an instance (a singleton) of Work manager which requires and activity to launch and then we enqueue our notification work which adds into the workers list of tasks to carry out.
/**
 * Schedule notification using the delay (how long before the notification is shown).
 */
 private fun scheduleNotification() {
        // A persistable set of key/value pairs which are used as inputs and outputs for ListenableWorkers.
        // Here we pass in our reminder name and description as key value pairs to be used by our reminder worker class
        // using the "inputData" variable
        val data = Data.Builder()
            .putString("name", binding.editTextReminderName.text.toString())
            .putString("description", binding.editTextTReminderDescription.text.toString())

        // try to get the difference between the reminder set time and current time
        // which sets the delay before the notification comes
        val delay = viewModel.getDelay()

        // schedule one time request using a delay in milliseconds
        val notificationWork = OneTimeWorkRequest.Builder(ReminderWorker::class.java)
            .setInitialDelay(delay, TimeUnit.MILLISECONDS).setInputData(data.build()).build()

        // get instance of work manager and schedule / enqueue a work
        val workManager = WorkManager.getInstance(requireActivity())
        workManager.enqueue(notificationWork)

        Log.d(TAG, "Schedule notification delay $delay")
    }
Attach click listeners
Here we call our scheduleNotification() method once our Add button is tapped.
/**
 * Attach the click listeners to the view
 */
 private fun attachClickListeners() {
        binding.chooseDate.setOnClickListener {
            showDatePickerDialog()
        }

        binding.chooseTime.setOnClickListener {
            showTimePickerDialog()
        }

        binding.addNewReminderButton.setOnClickListener {
            Log.i(this.TAG, "Add reminder button tapped")

            setEditTextAndSaveToDB()

            scheduleNotification()

            this.dismiss()
        }
    }
CONCLUSION
Setting up alarms is a best practice when you want to ensure that the user gets the information in this case a reminder of what the user set, this just shows how it can be done using Work manager.
I didn’t go over the implementation of ROOM database since it’s out of scope of this lesson and because it could simply be removed without really affecting the functionality of the application.
Thanks for reading hope it was explanatory and also not too long 👀.
Link to project source code on Github below:
